
The Fields tab on the Folio Template enables you to design the experience your users will have when they view or create a Folio record on this template. Folio provides you with a number of tools to design an effective and engaging layout for each Folio record. You can do the following in the Fields tab:
- Create new fields or add fields from the Folio Field Library
- Design your Folio record layout
- Group fields in Sections
- Create Tables
- Make fields dependent on answers in other fields.
- Create formulas based on values entered in numeric fields
- Set the visibility of the fields in a stage making them Mandatory, Optional, Hidden or Read Only
- Create a default view for list screens for users
- Add the Risk Matrix to your Folio Template
- Preview the Folio record layout that you are designing.
Top Bar

At the top of the Fields tab you will see the following buttons:
- + New Field: Enables you to create a new field or add existing fields from the Folio Field Library.
- Under the down arrow you will also find:
- Create a New Field: Enables you to create a new Field
- Import Fields: Allows you to create new fields or add existing fields to the template through import
- Create a New Field: Enables you to create a new Field
- Under the down arrow you will also find:
- + Risk Matrix: Adds the Risk Assessment field to the Folio Template.
- Visibility: Set the visibility of fields to optional, mandatory, hidden & read only by stages. For more information please refer Folio Field Visibility
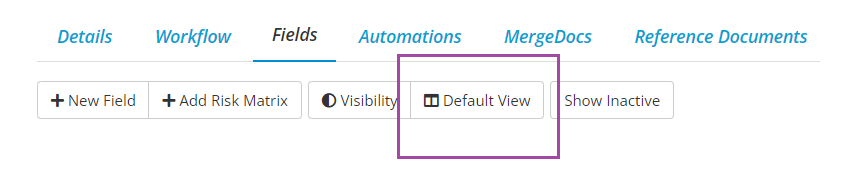
- Default View: Set the default view for list screens for users.
- Show Inactive: Shows any inactive fields which are part of the template.
- Preview: Lets you preview the Folio record layout while you are building it. For more information please refer How do I preview a Folio Template?
How to add Fields
Fields can be added to the Folio template by clicking on the + New Field button.
You can then Search for a Field from the Field Library. Folio allows you to reuse fields across different templates making it easy to filter or report across multiple Folio Templates. If you change the Name or the Instruction in a field it will affect all Folio Templates that the field has been used on.
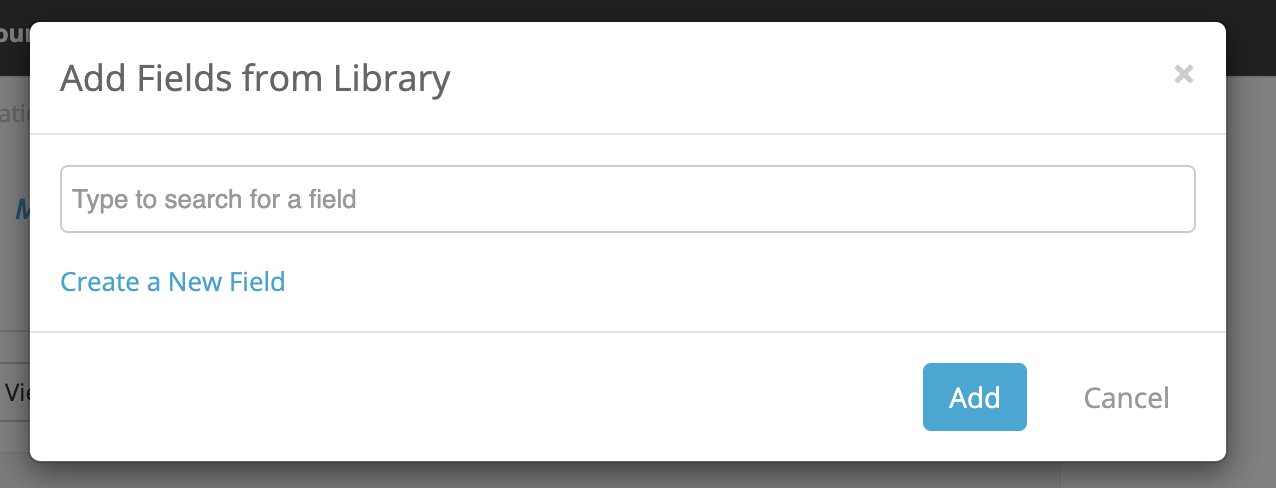
The fields will have the field type displayed alongside the name on the dropdown to help identify what the field is

You can also click on Create a New Field to create a brand new field for your template. This field will be added to the Field Library to be used on other templates.
Click here to learn more about Field Types.
If you have sections or tables in your template then you will also see the Section/Table option which allows you to select an Section or Table and have the fields be added directly to that Section/Table

How to Edit Fields
To edit a field simply click on the Fields name.


You can use the Prev/Next buttons to go to the edit screen for the prev/next field,And you can use Update and Next to move to the next field while updating the changes you made.
Note: If you change the Name, Instructions or Type it will affect all Folio Templates that the field has been used on, You can also only change the Type if there are no records with a value in the field.
Design your Folio record’s layout
You can design your Folio record’s layout. Folio gives you the ability to resize fields or drag and place them where you want. You may also group fields into sections or tables.
Resizing fields
You can resize fields so that more than one field can be added to a row of fields (You may have up to 3 fields in a row). To resize a field, grab the resize handle that appears on hover on the right hand side of the field card and slide left or right to reduce or increase the size of the field. Once the size of the field has been reduced you can place another field of an appropriate size in the space available.

You will typically be guided by data types you are capturing in each field. For example you would place the fields First Name, Middle Name and Last Name side by side on the same row as they are short text fields but the field Incident Description may be on a row by itself because it is a long text field and needs more space.

Drag and Drop to re-order
You may also order fields by grabbing the drag handle next to the field name and dragging the field to where you would like to place it.

See in the below example where the Your Phone Number field is moved into the Incident Report section

Note:
- Folio is a responsive application and the Folio record layout will rearrange itself on phones or tablets to work with the space available.
- The Risk Matrix has to be placed on a row by itself and cannot be resized.
- Fields on Tables come in fixed sizes and cannot be resized.
Creating a Section
Sections allow you to organise fields in a meaningful way by grouping them on a Folio record.
Sections are created by selecting one or more fields using the tick boxes at the start of the field cards and then clicking on the Create Section button.

You must give the New Section a Name, you may add some instructions and you can choose a distinctive Background Colour to distinguish the section for other sections. We give you four colour options, blue, orange, green or white but you may also enter a colour hex code to use your own colour.
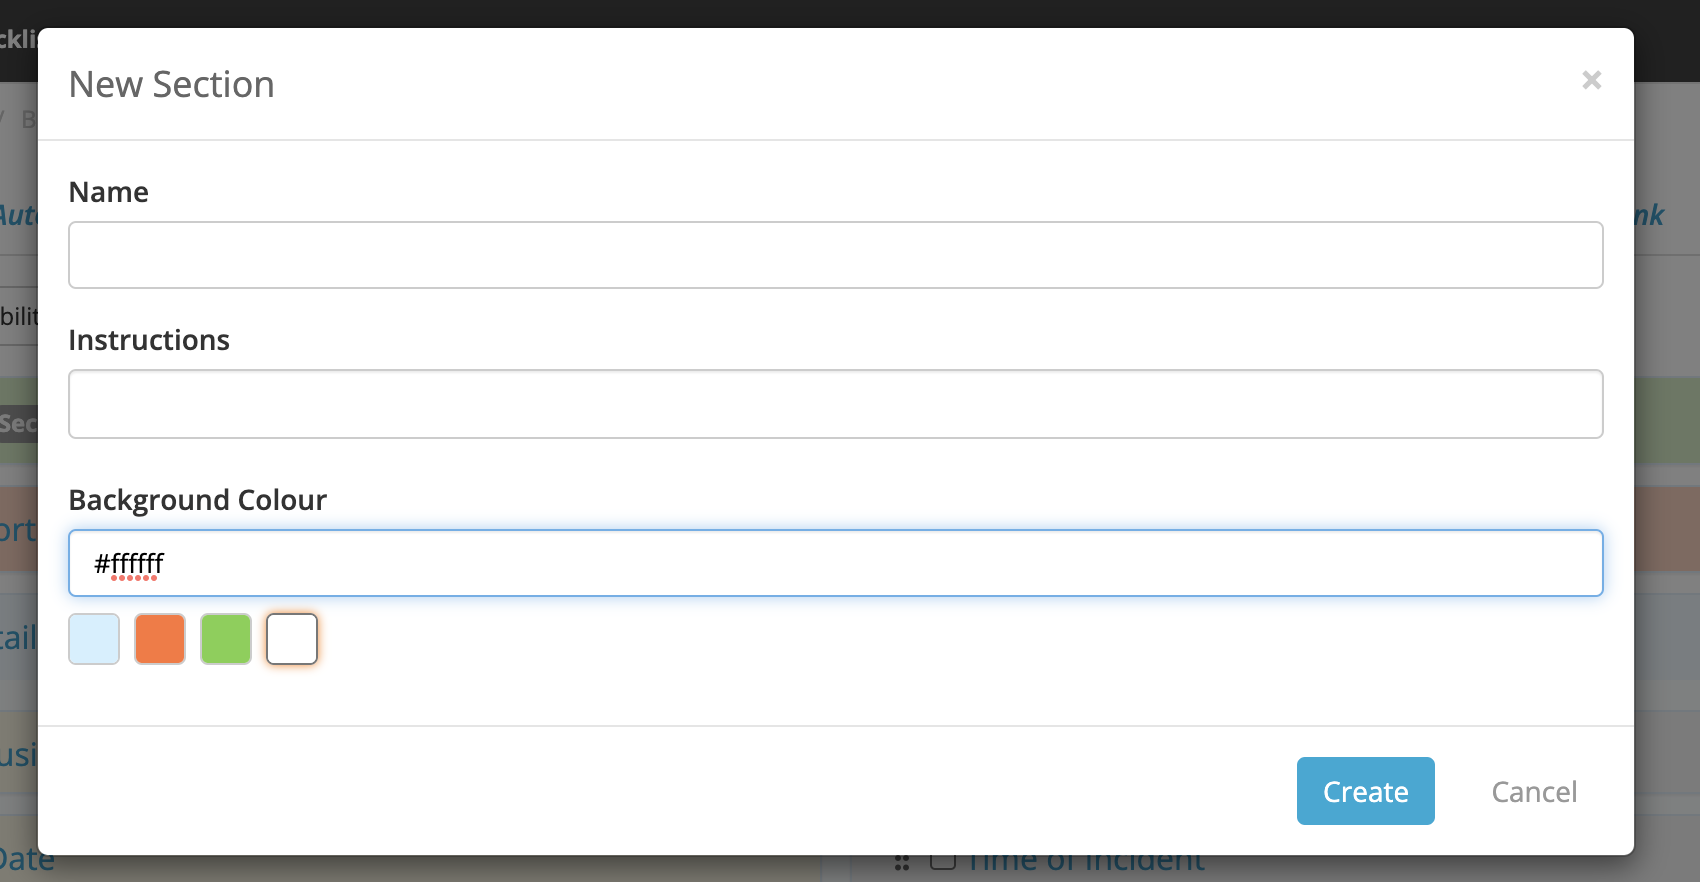
You can also add fields to an existing Section by first selecting the fields you would like to add to the section, then selecting the section you would like to add them to and clicking on Create Section.
Note:
- You cannot create a Section within a Section.
Creating a Table
Tables are a group of fields where a user can add multiple rows. Tables can exist both within a section or outside a section.
Tables may also be used to create a distinct grouping of fields within a Section where the user may only add one row of data and not more.
You can create a table by selecting one or more fields and clicking on the Create Table button.
You must give the New Table a Name and you may enter Instructions. You can choose a Layout for your Table (Click here to learn more about creating Tables) You can also add fields to an existing Table by first selecting the fields you would like to add to the table, then selecting the table you would like to add them to and clicking on Create Table.
Setting up dependent fields
Dependent fields appear when a particular answer is selected in either a single or a multi-select field. Dependent fields enable you to have fields, entire sections or tables hidden until the appropriate answer is selected.
Click here to learn more on how to set up dependent fields.
Setting up Visibility
Visibility allows you to select what fields appear in what stage. The visibility of the fields can be set to optional, mandatory, hidden & read only. To see how to setup visibility please refer Folio Field Visibility
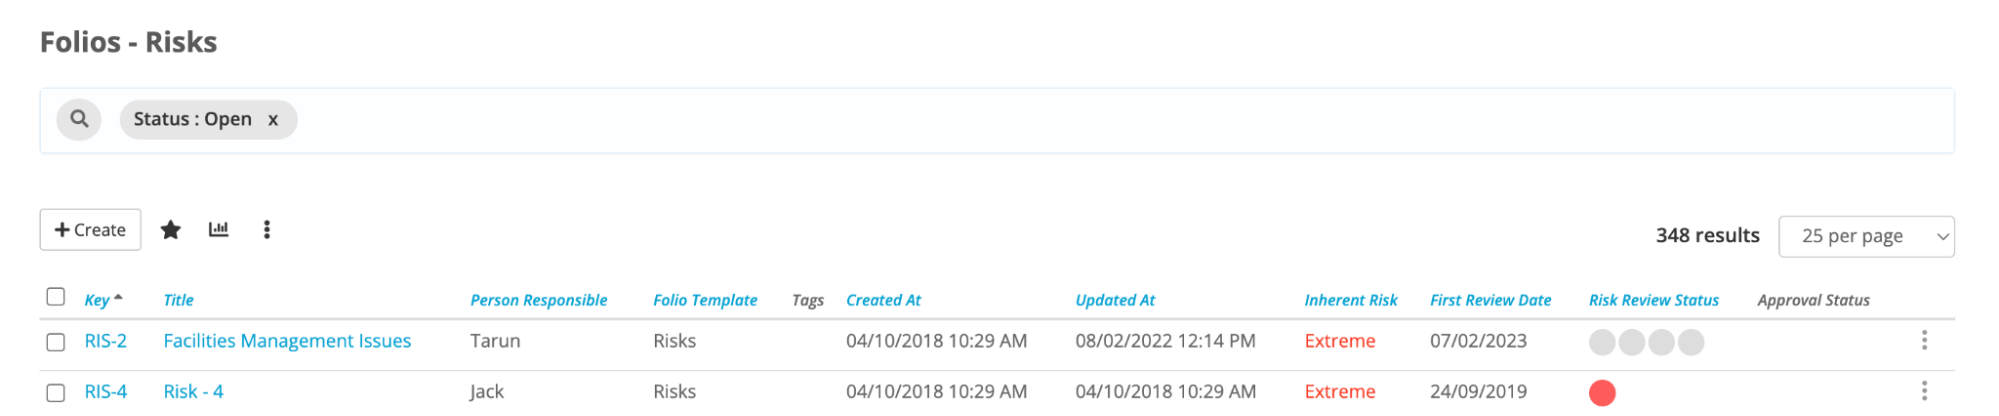
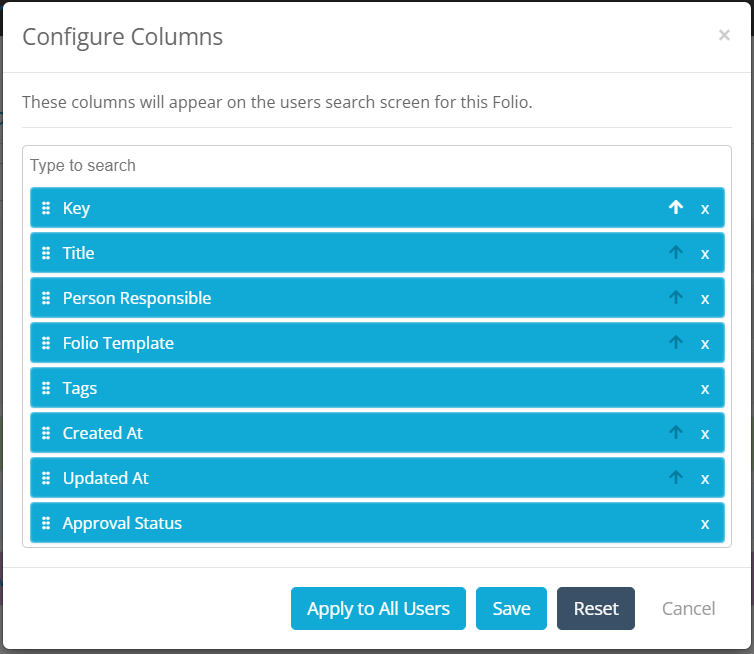
How to setup default view
Default view allows you to configure the fields that a user sees on a Folio list screen, this is the screen that a user lands on when they click on the Folios Menu and then select any Folio Template. It looks like this:
To set up the default view click on the Default View button. Select and rearrange the fields on the Configure Columns modal. You can also select the field on which the list will be sorted by clicking on the sort arrows. You may sort in ascending or descending order by toggling the direction of the arrows. You can only sort by one field at a time.
Creating Formulas
Formulas are Numeric Fields where the value of the field is automatically calculated based on values in other fields in Folio. To see how a formula can be setup please refer How do I add a Formula
How to preview a form
You can preview the form by clicking on the Preview button while you are building it. For more information please refer How do I preview a Folio without assigning it to a user?
Removing a Field
If a field has not been used in any Folio records and you no longer want to have the field on the template you can remove the field from the template by first selecting the fields you want to deactivate using their checkboxes and then click Remove Field

If the field has not been used in another template you will be given the option to delete it from the field library as well (meaning you will be unable to add the field to another template in the future but you can recreate if you want)

Deactivating a field
If a field has already been used in Folio records but you no longer want to have the field appear on the records you can deactivate the field to hide it from the template, but still retain the data that was already in the records. To do this first select the fields you want to deactivate using their checkboxes and then click Deactivate

You can then find the deactivated fields by clicking on Show Inactive, the deactivated fields will be shown in red.
If you want to Activate any fields select the fields checkboxes and then click Activate
